How To Add Custom CSS To Your Website In Under 60 Seconds
Adding custom css to your wordpress website is essential to adding authority to your website.
Fortunately, WordPress includes a way to do this by default which is by far the easiest way to go about it.
I’ll run through a few different ways on how to add CSS to WordPress and their pro’s and con’s, but first up let’s start with the easiest quickest way.
1. Adding Custom CSS To Your WordPress Site Using The Customizer
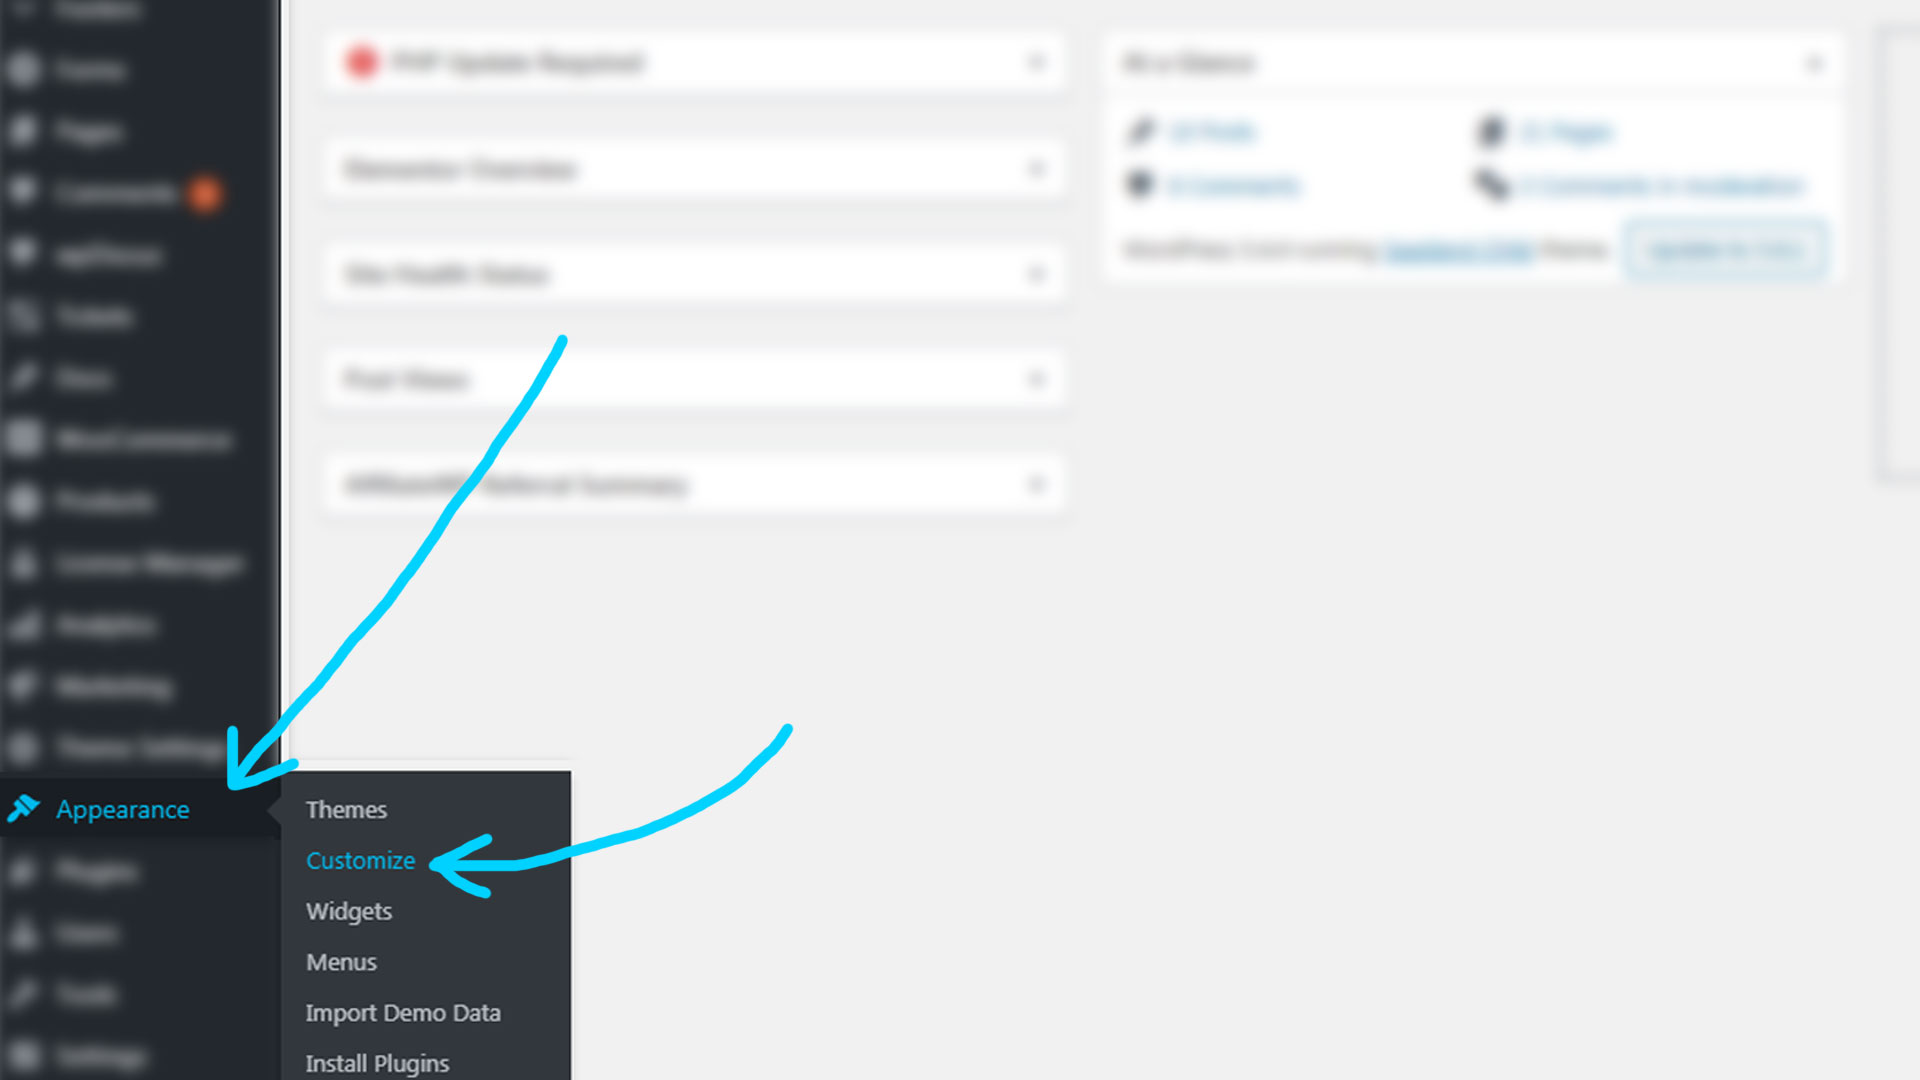
The first way to access this is by going to your wp-admin dashboard and going to Appearance in the sidebar > Customize
This will open the native WordPress Theme Customizer.
From here, you want to go to the last menu item Additional CSS.
This will open the native WordPress Theme Customizer.
From here you want to scroll down to the bottom and click on Additional CSS.
This will open the additional CSS interface as above.
Now you simply type your CSS into the white box and click on publish once your done.
One of the best things about this tool is that as you type your CSS styles into the white box they will immediately take effect on your website, so you can see your changes while you are working on it.
Don’t worry, they aren’t committed to your website until you click publish at the top right of the customizer.
So make sure you don’t forget to publish your CSS changes once you’re done.
Accessing The WordPress Customizer Via The Frontend
If you are logged into your website and have the admin bar showing at the top while you are viewing the public facing section of your website, you can also access the customzier from here.
This is great for adding some CSS on the fly, it also has the benefit of displaying the customizer on the page you are viewing so you can immediately see if your changes are going to be effective.
2. Adding Custom CSS To Your WordPress Site Using A Plugin
You might be wondering why you would possibly want to add another plugin to your website just for managing CSS when WordPress can handle this natively.
Plugins offer a few extra features that the WordPress Theme Customizer does not, with that being said there’s only so far you can take CSS features.
In my opinion, the main reason I would get a plugin for CSS would be to add CSS to specific pages.
This serves two benefits:
- It allows you to apply CSS only to the pages that is needed, which will have a small, but positive impact on your site’s speed and performance
- It allows you to apply broad CSS changes without affecting unwanted areas of your website.
What's The Best Free CSS Plugin For WordPress?
There’s a few good ones, if you want to have a look at the list yourself i’d recommend just typing custom css into the wordpress.org repository.
#1 Pick - Post / Page Specific Custom CSS
If I were to get a CSS plugin, i’d probably choose Post/Page specific custom CSS for two reasons.
The first reason is as described earlier, it offer the functionality of adding custom CSS per page.
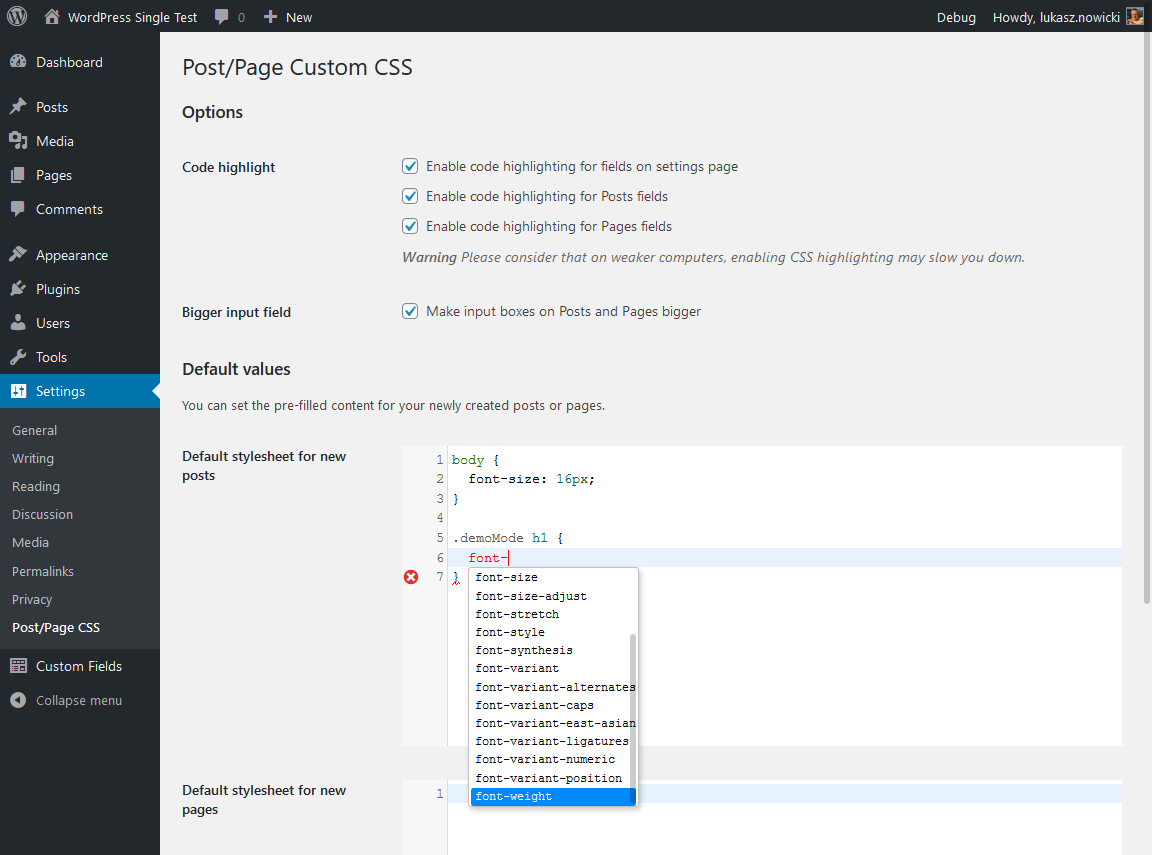
The second is that it has a bit of an improved interface offering CSS hints and autocomplete functionality as you’re typing.
Now, when I say it adds custom css per page, you still have the option to apply global CSS styles as in the screenshot below.
You can download it here.
Other notable mentions for best free css plugin go to Custom CSS Pro and Simple Custom CSS and JS.
Custom CSS Pro
Custom CSS Pro is a super simple, lightweight custom CSS plugin for WordPress.
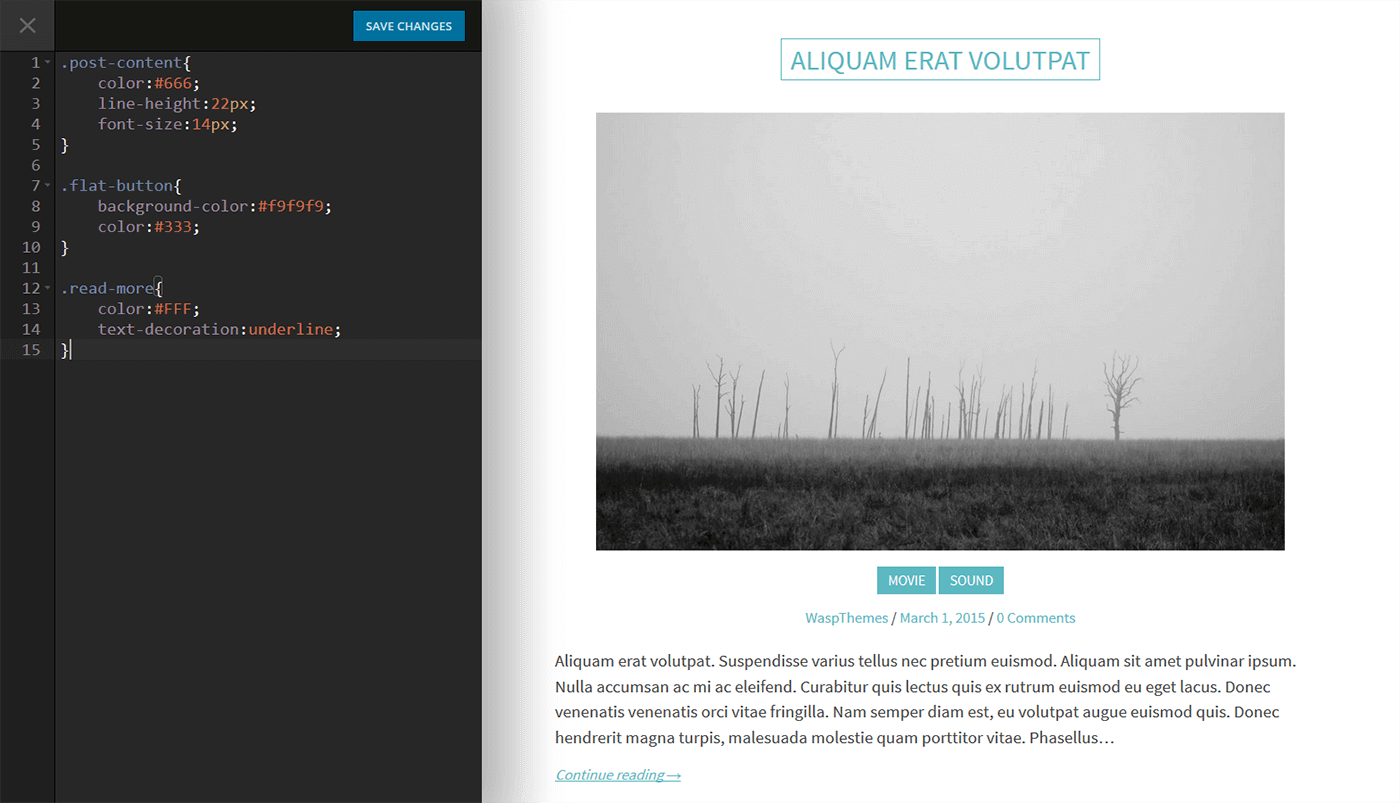
In essence it is not wildly different from the native WordPress Customizer, it’s just a little more enhanced.
The reason it features on this list is that it offers a live editor with a strong user interface, you’ll be surprised how much easier writing code is when it’s super readable and accessible.
You can download it here.
Simple Custom CSS and JS
It’s out of the scope of this article, but heck if you’re adding a plugin for CSS why not throw JS into the mix too.
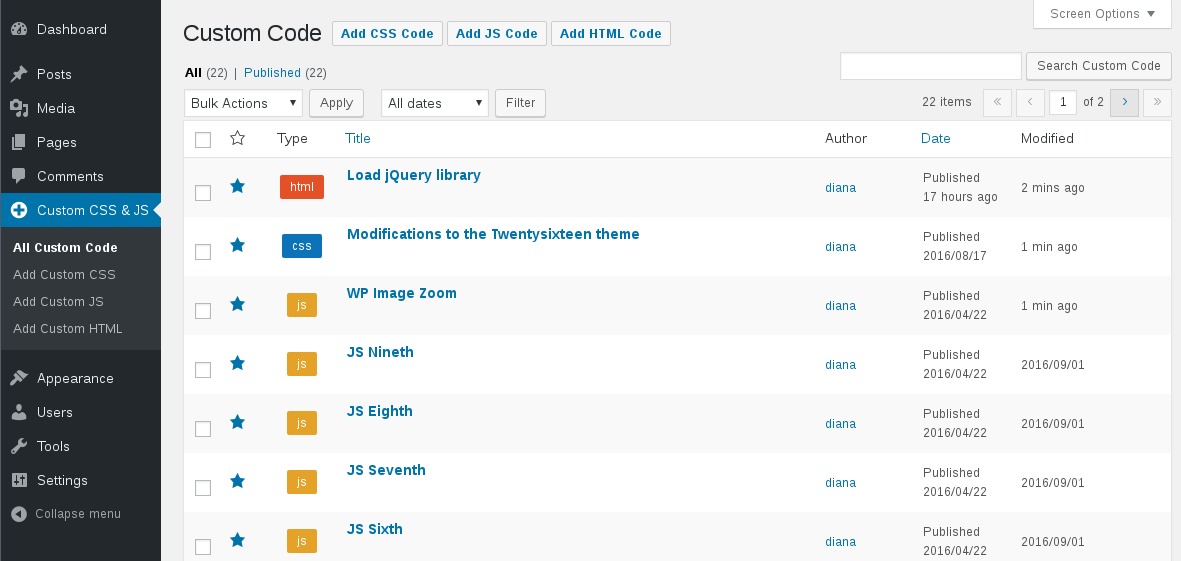
This plugin offers a lot of modularity and utility by allowing you to create multiple blocks of code.
You can then choose where and when these blocks of code are applied based on some fairly simple logic such as frontend or admin dashboard, header / footer (particularly useful for JS) and whether the file is linked internally or externally.
If you don’t know why you would want these features, then this plugin is probably not for you.
You can download it here.
What If My Theme Includes A Custom CSS Section?
A lot of themes offer custom CSS modules within their theme options.
Personally, this is how I tend to manage my CSS.
The interface is often better than the native CSS Customizer offered by WordPress and you don’t have to go and bloat your website with an unnecessary plugin.
What's The Best Workflow For Custom CSS In WordPress?
This is where I will speak from my opinion based on the workflow that has worked best for me over the years.
Everyone handles things differently, this is how i’ve done it and works for me so you can take it or leave it.
Use The Developers Console In Your Web Browser (I would recommend Chrome or Firefox)
The developer console on your browser will be your best friend here.
They offer huge amounts of features, so i’ll just quickly brush over the fastest and easiest way to make changes.
Find The CSS Selector Of The Thing You Want To Change
Okay, for examples sake we’re going to change the colour of the menu items on this website.
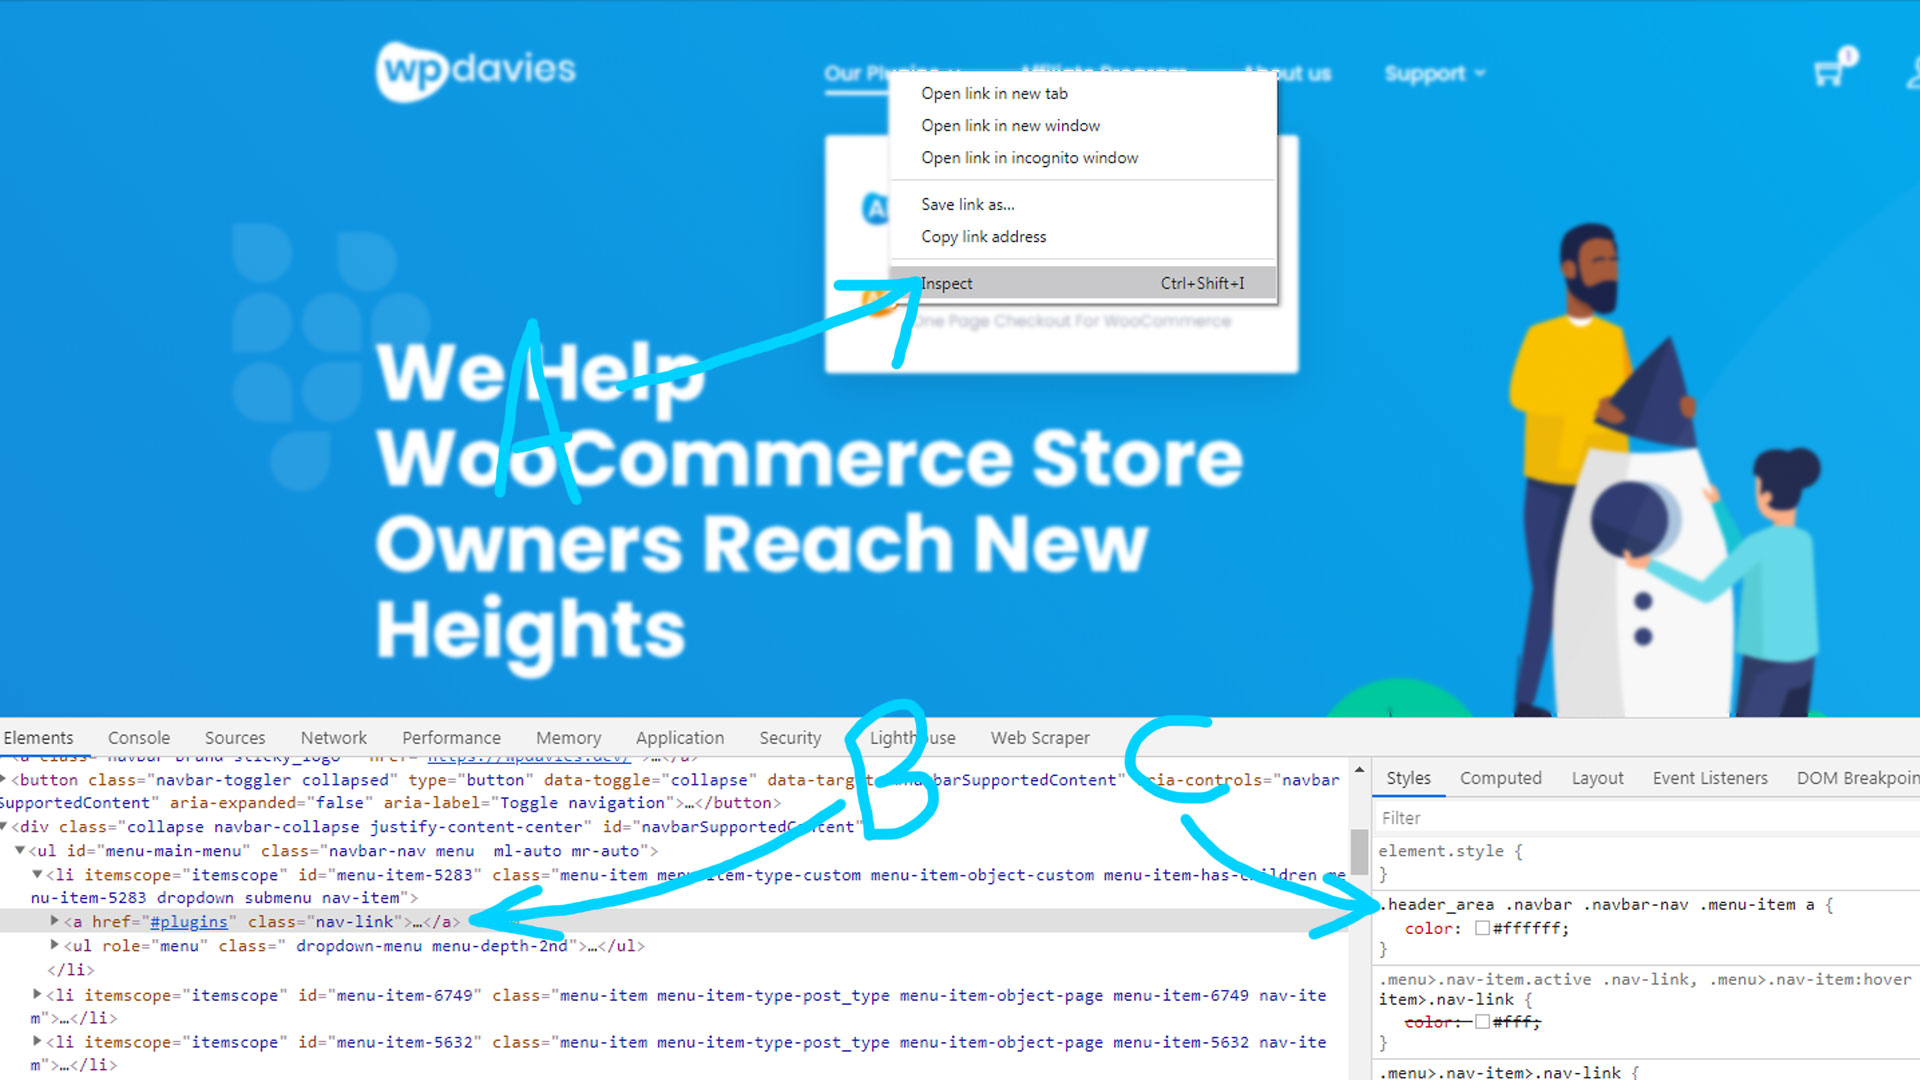
Begin by right clicking one of the menu items and then click inspect.
This will open up the dev console if it’s not already open.
Two things become apparent, on the left side of the dev console is all of your page’s HTML.
It should have automatically selected the element you are after as you can see denoted by B.
If not, you can click on the correct element.
In most cases, this will show you the correct CSS selector on the right side of the panel (denoted by C).
You can see that the existing CSS style responsible for setting the menu colour is: .header_area .navbar .navbar-nav .menu-item a
If you click on the color box next to the color style it will open up a color editor which you can choose to suit.
As you can see as you make changes in your web browser they will appear live, once you refresh your browser all these changes will go away unless you’ve saved your CSS to your cusotmizer.
Now all you need to do is copy and paste the CSS code into your preferred CSS customizer.
You need to copy the identifier with curly braces and the CSS code, in this case I would be copy pasting the following into my css customizer:
					.header_area .navbar .navbar-nav .menu-item a {
    color: #00ff13;
}
Making Lots Of CSS Changes In WordPress
Now more often than not you’re doing a whole bunch of CSS styling.
The way I handle this is exactly as described above, but as I go I will copy and paste my work into a text pad just to keep it to the side for the time being.
As long as I don’t refresh my web browser, all the changes will still remain visible.
Once i’m done working on whatever it is I will copy and paste the new CSS styles from my text pad into my CSS Customizer to commit the changes.
The reason for this is that you might end up undoing or making a lot of changes on the CSS you are working on and if you are saving and refreshing a page every single time you write one line of CSS then it will slow your workflow down considerably.
A Summary Of How To Add Custom CSS To WordPress
In summary, my recommendation when wondering how to add css to WordPress would be to use your theme’s CSS customizer if it has one.
If your theme does not have a custom css module just use the WordPress Customizer unless you have a specific reason to use a plugin.
One last way to add CSS would be to open up your file manager using an FTP connection and directly writing files, I find this to be a bit painful though in some circumstances it can take a long time for the changes to appear and slow you down dramatically.
Anyway, if you have any questions or I missed anything don’t hesitate to leave me a comment in the section below!
Thanks, Chris

